Tips for Making Needle Felted Animals
Felting needles
Polyester Batting for Base Shape
Making Animals Fluffy
Limbs
Types of Wool
Dyeing/Drying
Basic Tips
Thin Legs
Hooves
Glass Eyes
This is not a complete tutorial, just a collection of my preferred techniques for making needle felted animals.
Needles
1. My favorite brand of felting needles are '#38 medium star'. These are all-purpose needles with extra notches that make them felt faster (more fibers matted per stroke). Although felting needles come in a wide array of shapes and gauges, I use '#38 medium star' for all sorts of work, including felt miniatures.
update: you should also check '#36 star' needles that appeared recently; coarser than #38, they are better suited for preliminary work; I also love 'twisted' (or 'spiral') needles that felt fast and are very durable
You can buy those needles on eBay or Etsy, just query for 'star felting needles' or 'twisted felting needles', without quotes.
2. There are 'needle holders' that combine several needles for faster felting. They can be especially useful at earlier felting stages to create the base shape. You can buy them on eBay or Etsy as well or make your own holders by tying several needles together with a string or a thread, or using a glue gun.
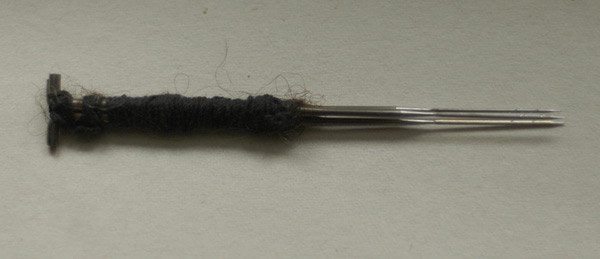
a three needles 'holder'. my brother Grisha who also makes felted toys taught me this trick.
I usually start felting using a bunch of three needles, then switch to two, and only then to one. The longer you work on a sculpture, the harder it gets, so at some point felting with three or even two needles becomes difficult.
Miniature toys and parts like limbs may be easier to do with a single needle right from the start.
3. To avoid breaking your needle while felting, don't jitter it from side to side, but push in a straight line (not necessarily perpendicular to the shape surface, but with no lateral motion). Needles break when you drive them in and then move sideways, even slightly.
The notches on a needle wear off over time reducing the felting effect, so at some point you'll need to replace your needle with a new one. It's a good idea to have a few needles/sets at any given time and swap them now and then, since felting with the same needle for a long time makes it very hot and the notches disappear even faster.
Wool
4. When I make larger animals, I use polyester batting or polydown for the base shape in order to save wool. These synthetic materials are cheaper, but are as easily needle felted as wool. After making a base shape with one of these materials, I cover it with a layer of real wool.
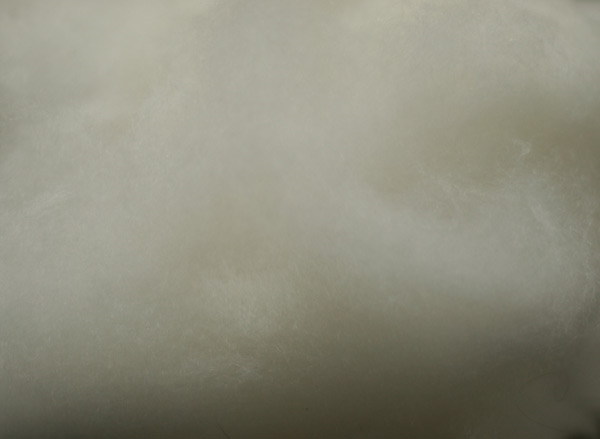
polyester fiber; for the base shape, use any cheap wool or synthetic material that can be felted, if you want to save high quality wool.
5. The base shape should not be felted too hard. As you felt the base shape and then add layers of wool, the felted material gets harder and harder with each needle stroke. It's possible to make wool almost rock hard by felting, after which you won't be able to further shape it with a felting needle.
Please note: Polyester batting and polydown felt faster than wool and get harder, so it's easier to spoil a sculpture through overfelting when using one of these materials.
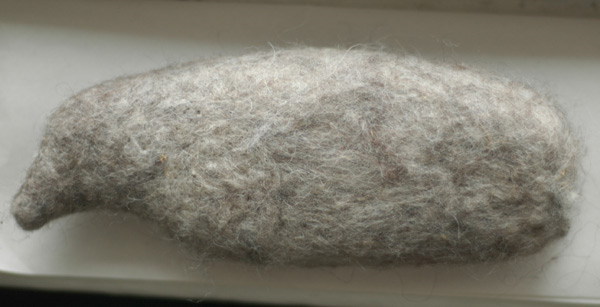
base shape covered with wool
6. At a certain stage in the felting process you can start shaping with your hands instead of a needle, as if working on a clay sculpture. The piece needs to be hard enough for that, to keep the shape that you give it by hand-sculpting. One tool that is quite useful at this stage is a long needle or an awl. To squeeze your shape, push it with your fingers or thumbs. To make some part of it larger, stick an awl in and pull the material up. Then, after hand-sculpting it as needed, you can reinforce the shape by additional needle felting.
9. Your finished toy can be as soft or as hard as you like, but soft sculptures have to be handled carefully as they don't keep their shape well. Make your pieces harder if you want them to preserve every minute detail in shape and expression.
10. A dog brush with metal bristles can be used to make felted animals fluffy. Felt the surface hard enough first to avoid ruining your toy when brushing it.
There are special needles for creating fluffy surfaces. They have reverse barbs that pull fibers out of the shape instead of felting them in. They are easier to use than a dog brush and create a little different effect (shorter, tidier, curlier hair). Etsy shops that sell reverse needles. Other possible names: 'inverse needles', 'reverse barb needles', 'inverted needles'. Here is a toy with hair created using one of these needles:
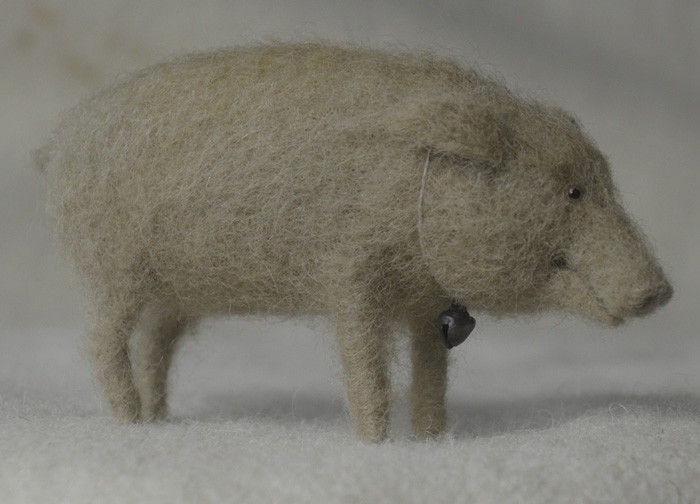
the hair was made using a felting needle with reversed barbs which pulled fibers out of the shape. no synthetic fiber was added inside this toy to avoid it coming out as hair. by adding a combination of wools of different colors inside the sculpture you can create spots and transitions when using this technique.
Yet another technique for creating long animal fur that has become very popular in recent years is detailed here.
11. Wool can be matted even without a needle, just by rubbing, so to keep its fiber structure intact, it should be handled carefully before being felted.
For a super smooth surface, choose thin wool and apply wet felting technique: dip your finished piece in soapy water and rub its surface thoroughly to mat any stray hairs left after needle felting. Wash your toy well after wet felting to avoid a yellowish tint from soap. Wet felting does diminish the size of the piece, especially if the piece hasn't been felted very hard. Without wet felting, you may need finer needles to make the surface quite smooth.
Use (often cheaper) rough wool to create less detailed and more natural looking surfaces. Fine needles are not required when using rough wool, just rub the surface of the piece lightly with your fingers to hide any poke holes from needles.
12. Limbs can be created separately and then needle felted to the body at any moment. Just leave (or add) some unfelted wool at the end of a limb to attach it to the body with.
It may be recommended to use wire in legs for heavier animals as even hard felted limbs will bend under a heavy weight over time. Leave some wire at the end of the limb, make a hole in the shape using an awl, put some glue on the limb wire and stick it in the hole, then felt a bit of wool over the junction to hide it.
13. I use undyed carded wools or batts (sheets of wool) that are available in a wide range of natural colors. I also use raw uncarded wools.
To mix wools of different types or colors, you can use carding paddles (also called 'wool carders'; available on eBay).
For horse manes and tails, fleece works fine.
Felting wool can also come in the form of sliver, roving, or top. For my own felting styles, these types of wool are not as good as batting or raw wool as they have a more parallel fiber structure that may be difficult to hide. But they are useful for creating long animal fur, as mentioned above.
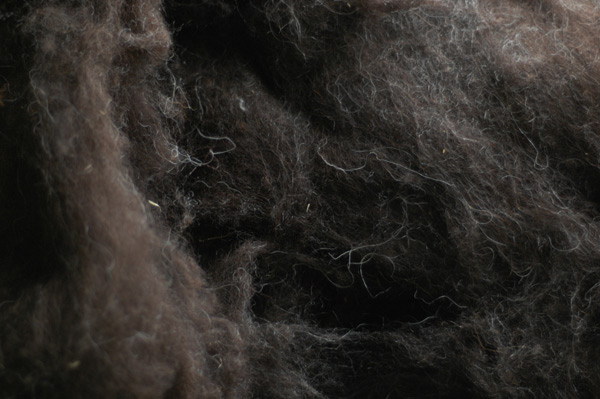
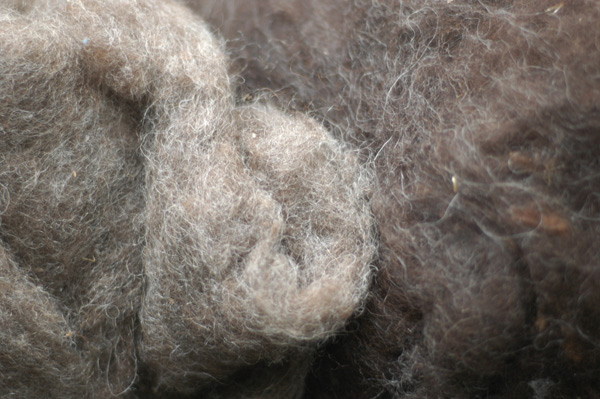
undyed carded wool
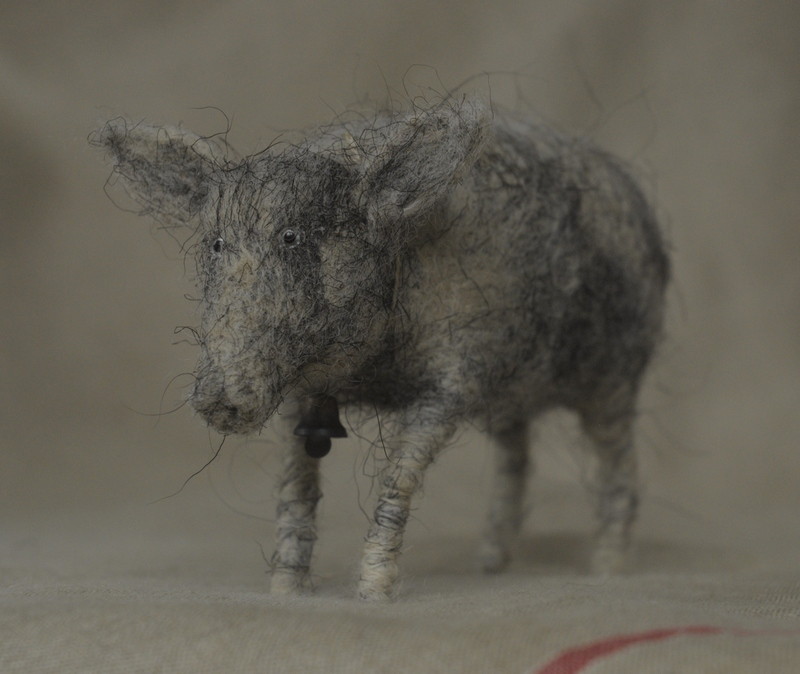
this piglet was needle felted from uncarded wool (washed raw wool); it's Romanov wool that has some guard hair in it (coarse black hairs in the picture).
Down is more difficult to needle felt, but it can be used as well.
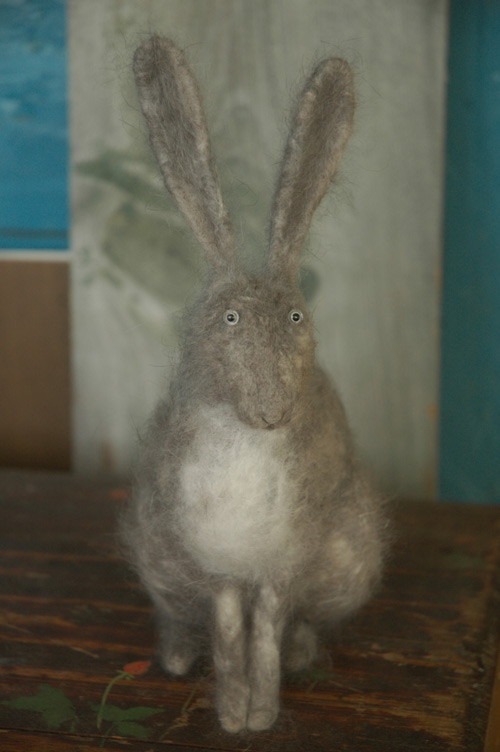
this hare was needle felted from the down of Angora rabbits which is more difficult to needle felt than sheep wool.
Basically, all sorts of wool can be needle felted, although some are not as easy to felt as others. As a general rule, finer wools are felted faster (that doesn't apply to down though).
Pictures
14. Sketching and making clay sculptures helps figure out particular details in animal anatomy. If you get stuck, it may be a good idea to make a sketch or a clay sculpture/detail sometimes, since this works faster than felting.
Using pictures as a reference is inevitable but not always helpful, as a 2D picture (or even a set of pictures taken from different angles) often tells surprisingly little about a 3D shape. At least, when first studying your model, realistic animal toys, figurines, and sculptures can provide a more useful reference.
Process
15. Much of the felting process is tedious; before you even start sculpting, the base shape needs to be completed. This preliminary work, as well as some other stages in the felting process require very little concentration, so audiobooks can be helpful.
16. Be careful: it's easy to hurt your hands with needles, especially when felting miniatures or miniature details. For some reason, felting needles hurt more than regular ones.
More:
Basic Tips
At the basic level, needle felting is easy, which may be one of its greatest appeals. You start by making a tight ball of wool (or synthetic fiber or whatever is your material - I will call it wool here for simplicity). For this, you can wind a piece of wool on your finger tightly, then pull it off, wind some more and fix it with a few needle strokes, then just keep adding material by winding it onto your shape and needle felting until you get the basic shape, such as an oval, or a ball, depending on what you're making. Just try to make this shape hard enough by winding wool tightly, that will save you a lot of needle felting work later on.
After you have your basic shape, you start more detailed feting work.
There are lots of basic needle felting video tutorials on youtube.com.
Thin Legs
For thin legs, I create limbs from pieces of wire (you can create a whole wire skeleton, but I find it more difficult).
I apply some glue to a leg 'bone' and then wind a piece of wool around it tightly.
Avoid using rusting wire as it will stain your sculpture if you wash it. Copper wire is recommended for wireframes.
Bird Legs
To create bird legs, do the same as above, but use a thread instead: apply some glue to the wire leg, then wind thread around it tightly.
Hooves
Hooves for both odd- and even-toed ungulates can be made from polymer clay or carved from wood and then optionally painted. To attach a hoof to a leg wire, heat a knitting needle or a piece of wire and burn a hole in the hoof with it. Then apply some glue and stick the tip of the leg wire into the hole.
Glass Eyes
I buy eyes on eBay: search for 'glass eyes' within the 'Bear Making Supplies' category: http://www.ebay.com/sch/Bear-Making-Supplies-/50253/i.html?_nkw=glass+eyes (on eBay, you can also find vintage glass eyes sometimes). Try to order several different sizes to find out what works for you. If you buy ordinary cheap eyes, take more than one pair of any size as eyes and especially pupils don't always match.
I use glass eyes on wire for my animals. Cut the wire so that an inch (or less, depending on the size of your toy) is left, make a hole with a big sewing needle or an awl in the shape where the eye needs to be attached, stick the wire in halfway, apply some glue to it, then drive it all the way in. If you use clear eyes, try to avoid applying glue to the eye itself so that it doesn't look fogged. But if you did and you've been using a transparent super glue, just let it dry, after which pry the eye with a needle to unstick it from the wool, and it will become clear again.
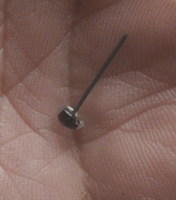
glass eye on wire ready to be attached.
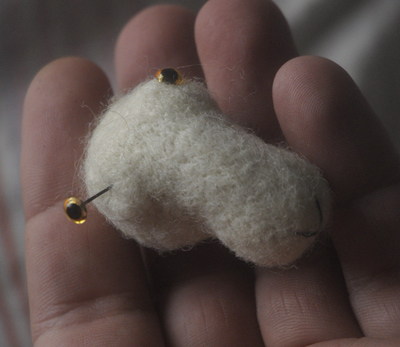
attaching an eye.
Dyes
If needed, wool can be dyed with natural or synthetic dyes.
If you soak your toy in a dye solution (as opposed to applying dyes by dabbing), pay attention to its orientation while it's drying. The color will be most intense on the down side of the toy. For instance, if you turn a felted quadruped upside down to dry, its back and the top of its head will be affected by the dye the most. Even if you just wash your animal after an unlucky dying attempt and then dry it, the down side may get slightly colored as any dye leftovers will accumulate on the lower surface.
Indents
To make a hole in your shape (e.g. for a nostril), just poke the same place a few times.
Extreme Shaping Techniques
If your piece got too hard through overfelting (especially likely when using polyester batting or polydown), you can sculpt by cutting pieces off your shape or decrease its size by brushing with a dog brush and then pulling out or cutting off extra piled wool. This may be necessary if you have overfelted your animal and can't change its shape in any other way.
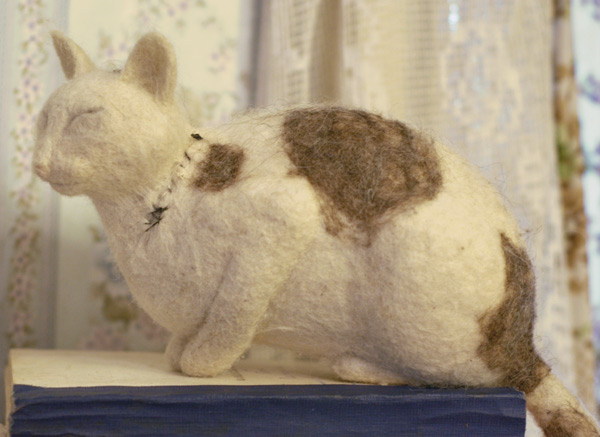
'extreme shaping technique' example: a section of the neck was cut out, then the two sides were sewn together with a thread; after that, the seam will be covered with fresh wool
Ruining Wool Fibers
Smaller shapes, like limbs, may become softer instead of harder with over-felting. This happens when you ruin the fibers so that they no longer hold together. Then it's almost impossible to reinforce the shape without adding much more wool to it, which will make it oversized.
Pushing the needle all the way through the shape is most likely to create this unpleasant effect. When you push the needle all the way through, it pulls fibers out of the opposite side, you felt them back in, they come out again and so forth until the fibers break and can no longer be matted. You could use a wire frame or even glue as a last resort, but it's not always practicable.
If you have any suggestions for improving these instructions, please let me know. Thank you.
Victor Dubrovsky (vriad_lee@chushka .com)
